Sunday, 13 January 2013

City and Guilds: Lines and Mark Making

The next chapter- drawing lines and making marks.

I enjoyed this chapter slightly less than the colour chapter but it does lead nicely into design and it has some interesting techniques mixed in.

My City and Guilds: Pattern Cutting which I did at IDC- Redditch

Lines to express emotions

Lines to express confusion

Lines to express tranquillity

Making marks with different mediums
 
More mark making
 
Making marks with calligraphy ink and a brush
 
Paint effects

Using a toothbrush to flick paint onto the paper

Using a dry brush to apply paint onto the paper
 
Printing with paint and various objects

Using string and cardboard to print swirls

Using leaves to print

Using bubble wrap to print
 
More printing techniques

Looking for lines around us

A leaf skeleton

More lines
Next chapter is texture and pattern.

Love,
Mrs Jones
x


City & Guilds: Colour

As promised I have been photographing my folder, it is lovely to go back through it and see all of the work that went into it. It is a very inspirational folder (I think!) and I may even drop the photos into college once all of it has been recorded.

My City and Guilds: Pattern Cutting which I did at IDC- Redditch.

This part one: colour.

Title page- all my own photos

Colour quotes
Primary colours

Secondary colours

Primary and Secondary colour wheel

Painted tertiory colour wheel

Tints, Tones and Shades
Primary tones

Colour spectrum

Ripped paper colour spectrum

Colour wheel created from paint sample charts
 
Photos of colour
Detail from photo page

Next up line and mark making.

Love
Mrs Jones
x

Sunday, 6 January 2013

More wedding makes


A belated post, as we are quickly approaching our first anniversary, but, here are a few more of the wedding makes. There are more, including the dress but I think this will suffice for now.

The invites
So this crazy making all started with the invites. We batted around ideas for quite a while but eventually found this picture in the back of a wedding brochure and decided to build are our invites around it.


Somehow we decided that tracing off the design onto acetate and then sticking it onto the invite was the way forward and not being someone to do things the easy way I decided to trace each one individually. This led to a bit of a production line but I was looking for work at the time so it keep me busy!

Tracing the design

Putting the cards together

A close up of the final design

To be honest collecting everyones address was a bigger job, and deciding on our gift list, and it was a very happy day, the day that I took them all to the post office.

The cake
Next we had to start thinking about the cake. We wanted to do a practice so it seemed sensible to do a Christmas cake that we could enjoy. I don't think it had quite struck us how much planning is involved in the cake- you need to make it in time to have at least a month to "feed" it, then you need to marzipan it two weeks before you are going to eat it and ice it a week before you are going to eat it. This means working all of this backwards. We decided to do a test run of the fruit cake as a Christmas cake.

Our test run
The Christmas cake turned out to be a huge success. I took the recipe from 'Cake decorating at home by Zoe Clark'
Cake Decorating at Home [Book]
The recipe book
We had seen this cake while we were in Peru and wanted to base our cake on this with the wonky layers, pattern and bold colours.
Our Inspiration

Maturing cake

The bottom layer

Packaged and ready to go
The cake toppers
I then started to think about cake toppers and saw this brilliant idea on etsy: Penguin wedding cake topper
Penguin Wedding Cake Topper Custom
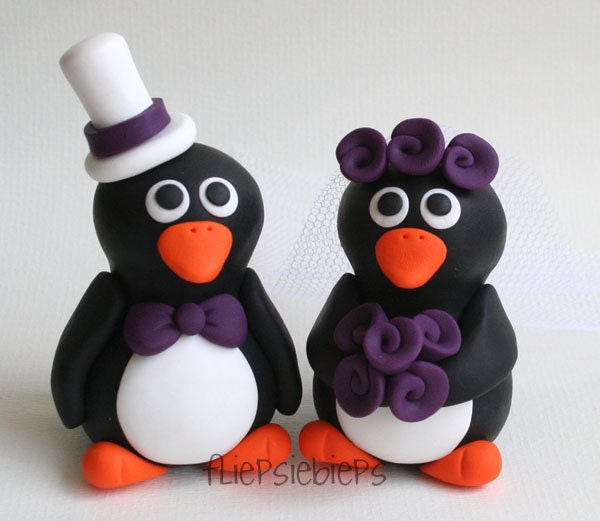
Cake toppers by fliepsiebieps on Etsy

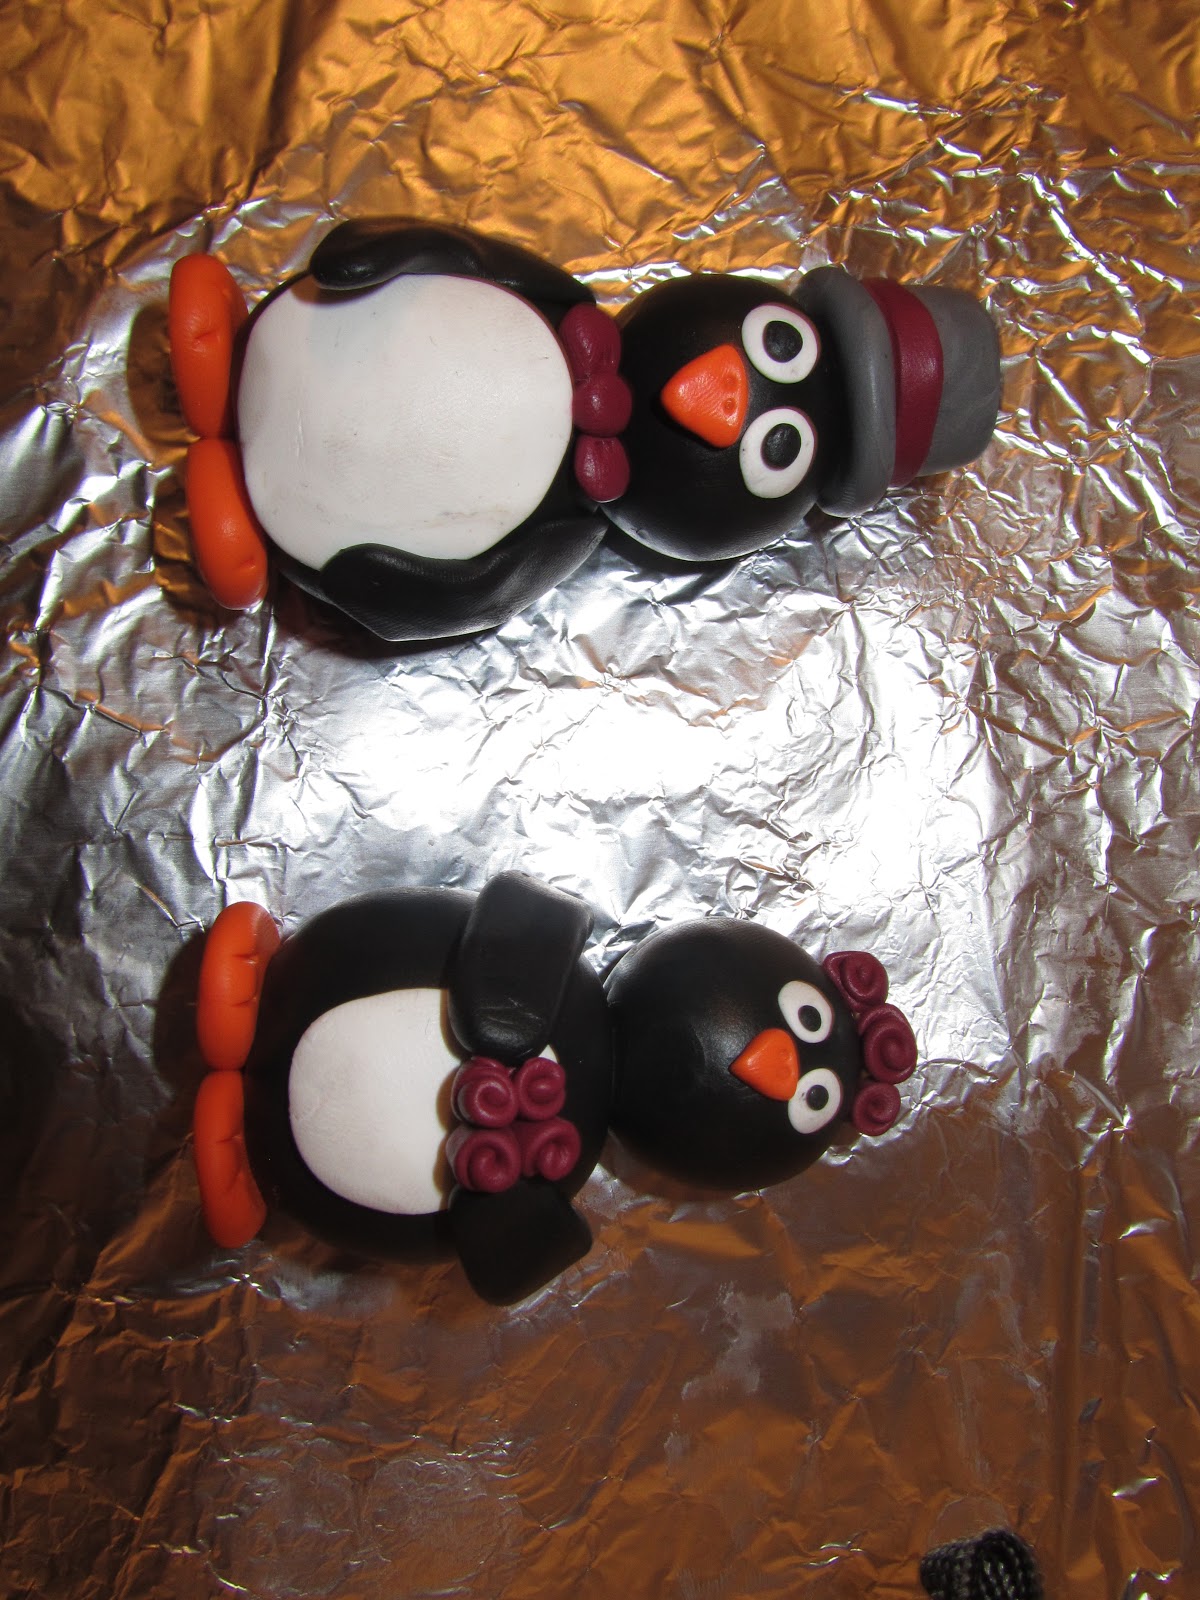
These were unfortunately a bit too expensive for us so I decided to try and make my own, £7 and a couple of hours later I had our cake toppers!

My head in the development stage!

Ready for the oven

Our cake toppers


And, after some careful packing and driving, here is the finished cake:

The cake :-)
Other handmade items

I will be brief here because we made a lot and you are probably bored already, but, here is a selection of other bits that we made.

Props and signs for the photo booth

Planning the photo booth!
Photo booth in action

Table plan

Buttons on the back of my dress

Lace at the bottom of my dress
Handmade bouquet and shoe flowers
 It is so good to look back at this and think about all the effort that we put in, I hope you enjoy it too.

Love,
Mrs Jones
x


Saturday, 5 January 2013

Time flies!

Well, I am a bit embarrassed by how long it has been since I posted; this is the peril of getting a full-time job and moving house.

But, I'm back! I've just been looking through my old posts and it seems that I need to update a few of them now that I have finished, yes, finished, my city and guilds with the certificate to prove it. I also have a new workspace in our new house and I have made some progress on my challenges so there will be a few blog posts to follow.

Before that I want to share a few of the crafts that I have done recently.

Firstly: rag rugging.
This is my new passion, to add to the others.I received this book from the wedding list:

Rag Rug Making [Book]

And was keen to try rag rugging but needed something to get me started, so I went to a workshop at Sew Me Something  in Stratford-Upon-Avon.


Where I met a lot of very nice people, had a couple of glasses of wine, got Mr Jones to collect me and started a rag rug cushion panel which looked like this when I brought it home:
https://mail-attachment.googleusercontent.com/attachment/?ui=2&ik=d1245cf23c&view=att&th=13c0ac8e6a6a6e8b&attid=0.1&disp=inline&safe=1&zw&saduie=AG9B_P-gTJRS6xg9lhvaKjRnr2EX&sadet=1357408452405&sads=NkGhRTisba9qq8VbuYQty3icq9I
Rag rug cushion pannel

A couple of weeks later I was the proud owner of a prodder and bodger:

and my cushion panel looked like this:

https://mail-attachment.googleusercontent.com/attachment/?ui=2&ik=d1245cf23c&view=att&th=13c0ac8a9b2ca131&attid=0.1&disp=inline&safe=1&zw&saduie=AG9B_P-gTJRS6xg9lhvaKjRnr2EX&sadet=1357408404499&sads=m6PEYZuUfUF77yVw-6rmYn4zfbI
Finished rag rug cushion
I am very proud of it. It was so enjoyable that I soon followed it up with a festive wreath:

https://mail-attachment.googleusercontent.com/attachment/?ui=2&ik=d1245cf23c&view=att&th=13c0ac876a827d94&attid=0.1&disp=inline&safe=1&zw&saduie=AG9B_P-gTJRS6xg9lhvaKjRnr2EX&sadet=1357408372470&sads=NzlGB_VvMxN3fzd0nwDsix_GlPo
Wreath in progress

and I even made another one for my parents. I am thinking that I will do a wall hanging next but need a direction to start me off. The downside is that I now can't throw any clothes out as they could be cut up and used so the charity shop is not doing as well out of me as it used to!

Secondly: I have been hemming trousers that I picked up in the sale.

Thirdly: I made these great presents for my parents:

An egg-box 360:
https://mail-attachment.googleusercontent.com/attachment/?ui=2&ik=d1245cf23c&view=att&th=13c0ac4fe30d493d&attid=0.1&disp=inline&safe=1&zw&saduie=AG9B_P-gTJRS6xg9lhvaKjRnr2EX&sadet=1357408322961&sads=l3f2HGlfykPJlI3HnQvLmCILhiM
Joke present for my parents

and a magzine holder for my mum as I had bought her a Mollie Makes subscription for Christmas.
https://mail-attachment.googleusercontent.com/attachment/?ui=2&ik=d1245cf23c&view=att&th=13c0ac67265efc7c&attid=0.1&disp=inline&safe=1&zw&saduie=AG9B_P-gTJRS6xg9lhvaKjRnr2EX&sadet=1357408283974&sads=65ojaCyFbl_pXaRkcii54-2VdYs
One side of magazine holder

https://mail-attachment.googleusercontent.com/attachment/?ui=2&ik=d1245cf23c&view=att&th=13c0ac6b1ae6db8c&attid=0.1&disp=inline&safe=1&zw&saduie=AG9B_P-gTJRS6xg9lhvaKjRnr2EX&sadet=1357408243158&sads=tkvVpZR5EH3oKV6Vw-Skx9XGqHc
Other side of the magazine holder

That's all for now folks. My mission for today is to take photos of my C&G folder to upload onto here.

Love,
Mrs Jones
x